 |
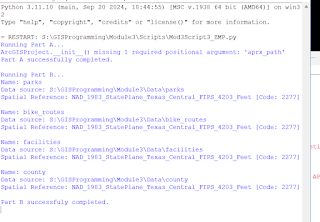
| Figure 1: Results of Script 1 |
 |
| Figure 3: Results of Script 3 |
 |
| Figure 4: Flowchart for Script 3 - This flowchart denotes the process for creating the try-except statement in script three that allowed the full script to run regardless of existing errors. |
Part
3: Make a code run even with errors
The try-except statement process was
not nearly as tedious or as terrifying as previously imagined. When the first
error occurred, a type error, I proceeded to write a try-except statement for
that section. When that ran, another error came up, a name error. Then, I wrote
another try except for that! After running that, another type error appeared!
Yikes! Then it hit me; you can do an all-encompassing try-except statement for
the whole block of code using the catch-all Exception class. The statement
began right after defining aprx and right before the final print
statement was processed.
I had to recall the importance of
indentation so that the try except statement recognized the complete block of
code.
Once the code was run, part b ran with no issue.
Overall, I really enjoyed this section of the class and see how useful this will become in the future.


No comments:
Post a Comment